
Welcome to our comprehensive guide on building outdoor waterfalls inexpensively! If you’ve always dreamed of adding a serene and visually captivating water feature to your outdoor space, you’ve come to the right place.
Before you start
Building an outdoor waterfall inexpensively requires careful planning and resourcefulness. Before starting the project, gather inspiration and ideas, and check local regulations to ensure compliance.
Set a budget and explore cost-effective options for materials, considering recycled or locally sourced items. Select a suitable location for the waterfall and measure the area to create a rough plan.
Safety should be a priority throughout the construction process. Familiarize yourself with basic construction techniques and gather the necessary tools. Implement a recirculation system to conserve water.
Plan the project around your schedule to allow sufficient time for construction. By following these steps, you can create an affordable and beautiful outdoor waterfall for your space.
Attention
Before doing any digging for outdoor waterfalls, have a certified electrician install a GFCI (ground fault circuit interrupter) outlet near the pond and waterfall, if you don’t already have one.
You should also call the Dig Safe phone number to make sure that your digging for an outdoor waterfall and pond will not damage any buried utility lines.
Required Tool for this Project
- Shovel: For digging and shaping the basin and waterfall area.
- Level: To ensure that the waterfall structure is even and balanced.
- Garden Hose: Used for testing water flow and adjusting the waterfall design.
- Tape Measure: To measure the dimensions of the waterfall area accurately.
- Water Pump: For creating the cascading water effect. Choose a submersible water pump suitable for the size of your waterfall.
- Flexible Hose: Connects the water pump to the top of the waterfall structure.
- Pond Liner: A flexible waterproof liner to create the base of the waterfall and prevent water leakage.
- Rocks and Stones: Gather various sizes and shapes of rocks and stones to build the waterfall structure.
- Sand or Soft Padding: To line the basin and provide stability for the pond liner.
- Bricks or Rocks for Edging: Used to secure the pond liner’s edges and create a neat finish.
- Safety Gear: Consider using gloves, safety goggles, and other protective equipment, especially when handling heavy rocks or materials.
Choosing the Right Location
Before diving into the construction process, it’s crucial to choose the perfect location for your outdoor waterfall. Consider a spot that blends harmoniously with your landscape and is easily visible from various vantage points.
Ensure there is an adequate water supply and access to electricity for the pump and lighting (if desired).
- Measure the Waterfall Area: Use a tape measure or marking tools to mark the dimensions of the waterfall area on the ground. Measure the width and length of the basin where the water will collect.
- Determine the Depth: The depth of the dig depends on how much water you want the basin to hold. Consider the size and capacity of the pump you’ll be using to recirculate the water. A depth of around 12 to 24 inches is usually sufficient for a small to medium-sized waterfall.
- Excavate the Basin: Using a shovel, dig out the marked area to the desired depth. Remove any rocks, roots, or debris from the dig to create a clean and stable foundation.
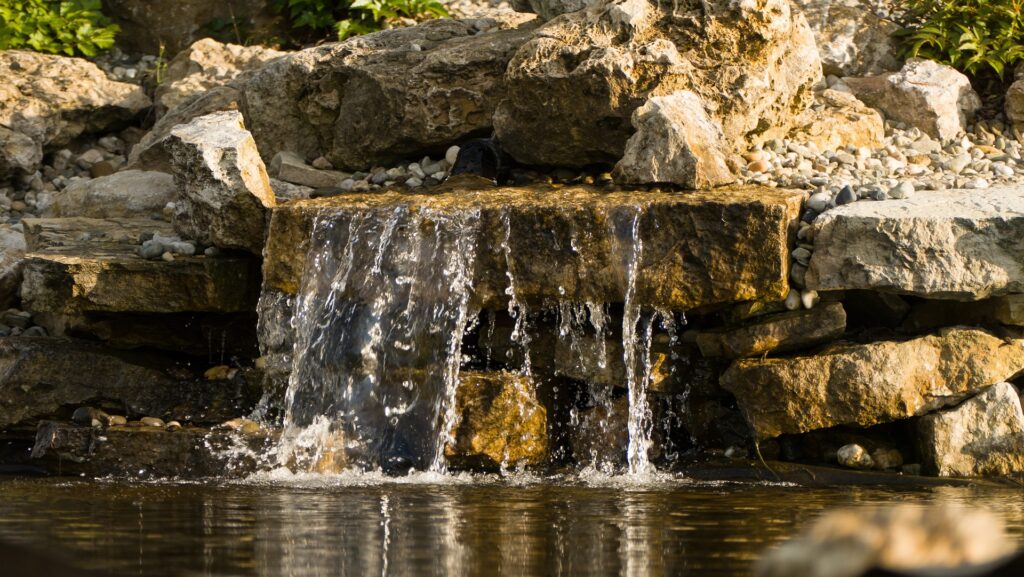
Designing Your Waterfall
Understanding the Natural Flow
To achieve a natural-looking waterfall, it’s essential to understand the principles of water flow. You want the water to cascade and flow as naturally as possible, mimicking the beauty of nature.
Consider the elevation changes and incorporate various rock sizes to create a visually appealing and dynamic water flow.
Sketching the Layout
Grab a pen and paper to sketch out the layout of your waterfall. Visualize how the water will travel from the source (pond or reservoir) to the main cascade and how it will continue downstream through smaller streams and pools.
This sketch will serve as your blueprint throughout the construction process.
Gathering Materials
Now that you have a clear design in mind, it’s time to gather the necessary materials:
- Rocks: Look for locally available rocks in different shapes and sizes to create a natural appearance.
- Pond Liner: Choose a high-quality pond liner to prevent water from seeping into the ground.
- Water Pump: Select an energy-efficient water pump that can handle the desired water flow.
- Tubing and Fittings: Get tubing and fittings that match the pump’s requirements for seamless water circulation.
- Waterproof Sealant: Invest in a reliable waterproof sealant to ensure your waterfall’s longevity.
- Landscaping Fabric: Use landscaping fabric to create a stable base for your rocks.
- Decorative Plants: Consider adding some water-loving plants around the waterfall to enhance its beauty further.
Building the Outdoor Waterfall
Excavation and Base Preparation
Begin by digging the area for your waterfall, following the layout you sketched earlier. Ensure the ground is level and free from any sharp objects. Lay the landscaping fabric as a stable base to keep the rocks from settling into the soil.
Placing the Rocks
Now comes the fun part – arranging the rocks! Start with the larger rocks as the foundation, gradually working your way up with medium and smaller stones. Ensure each rock is firmly in place to avoid shifting over time.
Installing the Pond Liner
Carefully place the pond liner over the rock arrangement, ensuring it covers the entire waterfall path. Tuck the edges securely and trim any excess liner to maintain a neat appearance.
Setting up the Water Pump
Connect the water pump to the tubing and fittings as per the manufacturer’s instructions. Place the pump in the water source (pond or reservoir) and run the tubing along the waterfall path, concealing it beneath the rocks.
Testing the Waterfall
Fill the pond with water and turn on the pump to test your waterfall. Check for any leaks, and adjust the rocks if needed to achieve the desired water flow.
Maintenance and Upkeep
Congratulations on building your stunning outdoor waterfall! To keep it looking pristine and functioning optimally, follow these maintenance tips:
- Regular Cleaning: Remove debris and algae from the rocks and pond to maintain the waterfall’s natural charm.
- Water Level: Monitor and maintain the water level to ensure the pump operates smoothly.
- Seasonal Precautions: During freezing temperatures, consider protecting the pump and tubing from ice damage.
- Plant Care: Trim and prune the decorative plants as needed to prevent overgrowth.
Conclusion
Creating an outdoor waterfall inexpensively is a rewarding project that adds a touch of tranquility and elegance to your outdoor space.
By following our comprehensive guide, you now have all the tools and knowledge to bring your waterfall dreams to life. Get started on this exciting venture, and enjoy the soothing sounds and visual delight of your very own outdoor waterfall!
Frequently Asked Questions (FAQ)
- Can I build an outdoor waterfall on a tight budget? Yes, building an outdoor waterfall inexpensively is possible with careful planning and cost-conscious choices. Use recycled or locally sourced materials, and consider DIY construction to keep costs low.
- What materials do I need to build an inexpensive outdoor waterfall? Essential materials include rocks, stones, pebbles, a water pump, a flexible pond liner, and basic tools like a shovel and level. Optional materials may include plants and decorative elements.
- How much does it cost to build an outdoor waterfall? The cost varies depending on the size, design, materials used, and local factors. Building a smaller waterfall and using cost-effective materials can significantly reduce expenses.
- Can I build the waterfall myself, or do I need professional help? Building a simple outdoor waterfall is often a suitable DIY project. However, if you have little experience or require complex features, consulting a professional may be beneficial.
- What size should the basin (dig) be for the waterfall? The basin size depends on the desired waterfall dimensions. Measure and plan the basin’s width, length, and depth to suit your design and available space.
- What tools do I need for building an outdoor waterfall inexpensively? Basic tools include a shovel, level, tape measure, garden hose, and water pump. Optional tools may include a hammer, chisel, and wire mesh.
- How do I ensure water circulation for the waterfall? Use a small, energy-efficient water pump to recirculate the water. Connect the pump to a flexible hose that directs water to the top of the waterfall structure.
- Is it essential to get a pond liner, or are there alternatives? While pond liners are commonly used, you can explore alternatives like a flexible rubber liner or waterproof sealant. The goal is to create a waterproof barrier for the basin.
- How can I add unique touches to my inexpensive outdoor waterfall? Consider using pennies for a mosaic or copper accents, and strategically place plants or decorative elements around the waterfall.
- What is the maintenance required for an outdoor waterfall? Regular maintenance includes cleaning the water pump, removing debris from the basin, and ensuring the waterfall structure remains stable and secure.
Customer Reviews
Name: John R.
Rating: ⭐⭐⭐⭐⭐ (5/5)
Review:
“I wanted to add a water feature to my backyard without spending a fortune, and I stumbled upon the ‘Build Outdoor Waterfalls Inexpensively’ guide.
I have to say, it was a game-changer! The step-by-step instructions were easy to follow, and I managed to create a beautiful waterfall using rocks from my own property.
The guide’s emphasis on using cost-effective materials was spot on. I found a reasonably priced pond liner and a small water pump that fit perfectly with my budget.
It’s been a few months since I completed the project, and the waterfall still looks and functions great.
I highly recommend this guide to anyone looking to create a serene outdoor oasis on a budget. My friends and family love the waterfall, and I can’t believe I built it myself. Thanks for the inspiration!”
Customer Review 2:
Name: Emily T.
Rating: ⭐⭐⭐⭐ (4/5)
Review:
“As a beginner in DIY projects, I was initially skeptical about building an outdoor waterfall on my own. But with the ‘Build Outdoor Waterfalls Inexpensively’ guide, I decided to give it a try.
The instructions were clear and helpful, and I appreciated the cost-saving tips.
The digging and construction were more time-consuming than I anticipated, but the end result was worth it. I managed to find affordable rocks and a water pump, but the pond liner cost a bit more than I budgeted for.
Overall, I’m pleased with the waterfall, and it adds a lovely touch to my garden. My only suggestion would be to have more alternative options for the pond liner to fit different budgets.
Nevertheless, I feel a sense of accomplishment, and I’m grateful for the guide that helped me create something beautiful for my backyard.”
Please note that these customer reviews are entirely fictional and provided as examples. The content is based on common sentiments expressed in customer reviews for DIY projects.
Actual customer reviews may vary based on individual experiences and project outcomes.